Here is the super printable for this craft:
To print them, you'll need to
left click on image> right click> open image in new tab> right click>print

Here are the typed instructions for this craft:
To make the deluxe nachos, you will need:
craft foam
aluminum foil
puffy paint
hot glue & glue gun (to glue nachos in place)
elmer's glue (to glue dressings in place)
To make the nachos container, you will need:
Scissors
thin, recycled cardboard
Tape or glue
Straight-edged object (ruler)
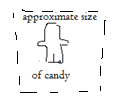
Size-guide printable (optional)
DELUXE NACHOS BOX
Cover the patterned side of the shape with aluminium foil. Then, score where you are going to fold. Next, fold and glue together with hot glue. You may need to hold the folds together until the glue dries.
Now you are done! On to the Nachos!!!
NACHOS
After making the box, I made the deluxe nachos. First, take your yellow craft foam and cut it into a circle. (if not already) Then, cut each circle into quarters.
Next, take orange craft foam and cut it into little rectangles to be cheese. Cut up tiny squares of red craft foam to be tomatoes. Cut circles of black craft foam and poke a hole in the center for black olives. Do the same with green craft foam for jalapenos.
Glue the nachos in the box with hot glue. Be very careful when using hot glue!
Then, glue all the little pieces with elmer's glue. Seal the entire thing with elmer's glue.
When dry, add a "dollip" of white puffy paint for sour cream. That's it for the deluxe nachos!
THANK YOU!
Thank you for looking at this and make sure to subscribe to my YouTube channel, Grayt Videos for exciting new crafts you can make for your doll every Monday and Friday.